Your iPhone screen just snapped. Now your MacBook won’t turn on. So, do you grab a screwdriver, pull up a YouTube tutorial, and dive in? Or do you reach for your wallet and let an expert handle it? Make the wrong call and you might save a few bucks—or you could end up spending twice as much to fix a bigger mess.
DIY repairs for phones and laptops sound tempting. Tutorials are everywhere, spare parts are just a click away, and lots of people swear they have fixed it all themselves. But honestly, that doesn’t mean every repair is a good candidate for DIY. Some fixes are basic and totally doable. Others will make you wish you’d called a pro from the start.
Let’s dig into the details: which iPhone and MacBook repairs make sense to tackle yourself, New Zealand prices (so you actually know what’s at stake), what tools and skills you’ll need, and—most importantly—when it actually pays to go DIY and when handing it off is just the smarter play.
Why This Isn’t Just About Saving Money
Most people think the choice is simple—take it to a pro, spend more money; do it yourself, save cash. But it’s not that black-and-white. If something goes sideways, your “cheap” fix can suddenly get expensive. Maybe you tear a tiny flex cable during a battery swap. What should’ve been a $40 part now turns into a $200 screen repair. Fumble a MacBook keyboard job and you might strip a screw or mess up a ribbon cable, creating a bigger headache.
But then again, paying someone to remove fluff from your charging port? That’s a waste when it’s a two-minute job with a toothpick.
So what’s the answer? It depends—on the kind of repair, your exact device, how handy you really are, and what tools you’ve got. There’s no one-size-fits-all answer, but with the right info, you’re a lot less likely to regret whichever route you choose.
DIY vs Professional Repair: Real NZ Cost Comparison
Repair Type | DIY Parts Cost | Tools (one-off) | Pro Repair Cost | Risk Level |
iPhone battery replacement | $20–$45 | $30–$60 | $80–$120 | Low–Medium |
iPhone screen (OLED) | $80–$150 | $30–$60 | $150–$280 | Medium |
iPhone charging port | $15–$30 | $30–$60 | $70–$120 | Medium–High |
MacBook battery | $80–$140 | $40–$80 | $180–$280 | Medium |
MacBook keyboard | $60–$120 | $40–$80 | $200–$400 | High |
MacBook screen | $120–$250 | $40–$80 | $280–$500 | High |
Water damage (any device) | Variable | N/A | $150–$500+ | Very High |
Do-It-Yourself iPhone Repairs – What You Can Reasonably Do Yourself
The battery is by far the easiest iPhone repair to do yourself
Apple has even made this process easier with their self-repair program (available for select iPhone models), which indicates just how hard this type of project would actually be.
In order to replace your iPhone battery, you will need the following tools and supplies: a good quality replacement battery (from a reputable supplier, as low-quality batteries can swell up and be potentially dangerous), a pentalobe screwdriver, a Phillips #000, suction cups, plastic pry tools and adhesive strips. iFixit has comprehensive guides to help you with your project on an individual iPhone model basis.
Where most people go wrong: Applying too much heat to release the adhesive, damaging the LCD connector while propping open the display, and purchasing a poor-quality replacement battery that shows only about 100 percent of the replacement battery’s charge. Take your time, follow the video instructions for your exact model, and do not force anything that is not moving.
Conclusion: For most people with an iPhone 6 through iPhone15, a DIY battery replacement is a good option.
Cautions for Changing Screens
An iPhone’s screen can be replaced, but with newer OLED displays it has become harder to do so than with older LCD models (iPhone 8 and prior) which were much more forgiving than the newer models. The new thin OLED screens are more fragile to install and require an accurate calibration for True Tone that can only be done by Apple or an authorized repair technician.
While purchasing an original display from Apple will cost you more than having a screen repaired professionally, the difference is considerably diminished when you add the cost of purchasing an aftermarket replacement. The quality of so-called aftermarket OLED displays is highly variable with some being of good quality but many of them being of poor quality.
In the case of the iPhone 12 and later models, the concern is with Face ID. The Face ID sensor assembly has been factory matched to the logic board of the iPhone. If, during the replacement of the screen, any of the small cables are broken then Face ID will not work and is permanently disabled, and no third party repair shop will be able to repair it, only Apple.
In conclusion: you can successfully do a DIY screen repair on older iPhone models (up to iPhone X). However, when considering whether to try and do a DIY repair on an iPhone 12 and newer, you need to weigh the potential savings against losing Face ID and the costs to restore Face ID depending on how much you want to risk losing Face ID (permanent loss).
Replacing Charging Ports is More Complicated than You Think
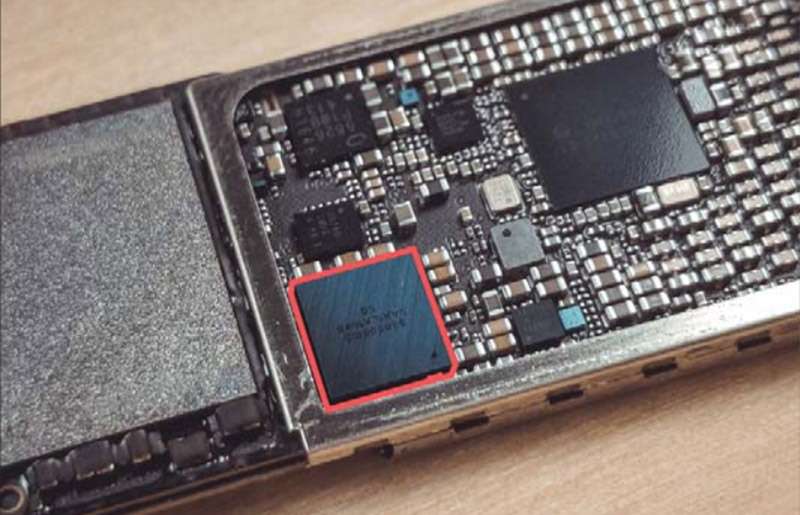
In many newly released iPhones, the charging port is hard wired into the logic board. This means that to replace the actual port you will need specialized tools for soldering rather than just having the skills to get started in soldering the port onto the logic board. Many times people think an issue is with the charging port when in fact debris or lint could be the actual problem, which can be easily removed using a clean, plastic toothpick or similar item and then using some type of flame to help get rid of the object(s).
If after attempting to clean the charging port issue continues could be due to a faulty port and should be handled by a professional.Summary. Always attempt to clean the charging port before proceeding to a location where you can replace the port, particularly if you do not know what else you may be doing with your device.
Water Damage is Not a Do it Yourself Job
If you accidentally drop your iPhone into a body of water, the absolute worst thing you could do afterwards is plug it in to charge. The second absolute worst thing to do is to open the device up and see if it is damaged. There have been numerous tests performed and they have all concluded that putting your phone into a cup of rice while it “dries out” provides very little to no benefit to resolve the issue. Furthermore, while waiting for the rice to dry you are allowing more time for possible corrosion to spread on the logic control board.
Ultrasonic cleaner equipment and skilled technical diagnosis by professionals helps them to assess the damage caused by corrosion on a water-damaged device before that corrosion becomes permanent. The sooner you seek help from an experienced technician, the greater the likelihood of recovering your device.
Your best option is to take your water-damaged iPhone to a technician right away because time is the only determining factor in whether you can recover your device or not.
MacBook Repairs: A Higher Bar for DIY
MacBooks are generally more complex to repair than iPhones. Apple has progressively moved toward integrated components — soldered RAM, soldered storage, and on Apple Silicon machines, a system-on-chip design that puts almost everything off-limits for third-party repair at a component level.That said, some repairs remain practical for a careful, patient DIY.
Battery Replacement — Possible But Complicated
Although it is possible to replace a MacBook’s battery, it is not a straightforward task. Removing the glued-in battery requires using the proper tool, following the correct sequence, and working at an appropriate pace to avoid damaging the laptop or battery.Compared to an iPhone, removing a MacBook’s battery may have more serious consequences (because of the MacBook’s greater size and cost). One of the biggest risks is damaging (by tearing) the battery while removing it, which may lead to it swelling and potentially catching fire.
Using the correct type of adhesive remover will greatly increase safety while performing this task. iFixit sells an excellent stretch-release adhesive remover.The battery replacement process on a pre-2016 MacBook with a removable battery is much more simple than on a post-2016 MacBook. M1 and M2 MacBook batteries are complicated slightly more than their predecessors due to smaller internal structures.
Conclusion: There are plenty of tools and resources available to assist a DIY battery replacement for MacBooks (post-2016). It usually will take 2-3 hours. Make sure you watch a complete teardown guide for your model before starting.
Key Board Replacement – A Task Best Left to the Experts
Replacing a MacBook’s keyboard can be one of the biggest challenges to repair. If you have models that utilize a butterfly keyboard from 2016 to the end of 2019, these keyboards are integrated into the top case assembly. Therefore, when one key fails, the entire top case must be replaced, which can range between $300 – $400, provided you are using a professional service for this repair.
If your model uses a Scissors-switch keyboard (from 2020 forward), it is possible to replace the individual keys instead of replacing the top case, but in order to do so, you will have to disassemble almost the entire computer in order to access the keyboard assembly. In addition to the numerous small screws, there exist numerous ribbon cables and very fragile connectors, making it a challenge for anyone other than someone with actual hands-on experience to successfully complete.
Conclusion: If you want to avoid causing additional damage to your expensive Mac, then you need to go for professional help.
Screen Replacement — For Professionals
The MacBook’s display is an expensive component, and in order to replace the existing display, cable routing through the hinge must be carefully done and the fragile connections must be correctly configured without flex damage. Mistakes made during the installation process could cause: backlight issues, flickering, or dead pixels that did not exist previously.On Apple Silicon MacBooks, some of the display features are tied to the logic board in ways that third party displays do not fully emulate. Automatic brightness adjustments may not work correctly and/or display profiles may not be accurate.
Verdict: If you have no previous experience replacing laptop displays, let a professional do it for you.
Thermal Paste Replacement and Cleaning — A Fantastic DIY Task
If your MacBook feels hot to the touch and you hear the fans working really hard, then cleaning out dust from the heatsink and applying a new thermal compound will change the way it performs (especially if it is 3 or 4+ years old).
This isn’t a component replacement, just removing the dust from the heatsink and fan and applying a new thermal compound to the CPU. Compared to other MacBook repairs it’s a low-risk repair to attempt.
In our opinion, this is an excellent project for anyone capable of taking apart their MacBook. Be sure to use a high-quality thermal paste – such as Thermal Grizzly Kryonaut – along with a can of compressed air.
Things to think about prior to doing any DIY project:
- Before grabbing any tools to do repairs ask yourself the following questions:
- Does the repair get reversed if something can go wrong?
- Have I seen a complete tutorial specific to the item & not just some generic directions like “iPhone” or “MacBook”?
- Do I have the correct tools, or is it worth it to purchase tools just for the repair?
- Is my item still under warranty or AppleCare? (DIY repair voids this immediately.)
- Do I have a backup of all my data? Always do a backup before opening any devices.
- Am I in an area that has good lighting and a way of keeping all the screws (tiny parts) organised?
- Am I purchasing the replacement part from a reputable source, not the lowest price from an auction site?
If you answered all of the above questions with yes then doing the repair yourself (DIY) may be a good option for lower level repairs. If you answered no to any of the above, hiring someone who is professionally trained to do the repairs will most likely be a better financial decision.
What can you do to select a reputable repair facility?
Not all repair shops offer similar services, and there are ways that reputable repair shops distinguish themselves from less-than-reputable repair providers.
Affordable Pricing – A trustworthy repair shop will give you an estimation of cost prior to performing any work on your device. If they cannot provide a price estimate until they “look at it,” request an approximate worst-case price (in writing).
Part Quality – There is a significant difference between OEM parts (OEM) made by the OEM, factory original parts, and inexpensive third-party parts. Each reputable repair shop will clearly identify to a customer what types of parts they use and allow a customer to choose from among the different quality parts. If a repair shop does not clearly disclose the quality of the different types of parts they use; this may be a good indicator of their reputation.
Warranty – A good repair shop will provide you with a warranty for both; their labour and the part that is being replaced (most warranties range in time from 90 days to 12 months). If no warranty is being offered; walk away from the repair shop.
Timeframe – Any repair facility that agrees to repair a MacBook logic board in 30 minutes is either; not doing a proper repair, or cutting corners. Diagnosing the cause of why your repair fails usually takes time. Be doubtful of anyone who claims to fix complex problems easily or quickly.
Whether you’re sourcing quality parts for a repair you’re confident doing yourself, or you want advice from people who work on these devices every day, Erepair N Spares is here to help you make the right call.
Need this fixed in Papakura?
Our technicians deal with this every week at our store on Great South Road, Papakura. Learn more about our iPhone repair in Papakura, call 021 0847 5935, or book a repair online. Diagnosis is free, and you get a clear quote before any work starts.